How to Send Emails Using Gmail SMTP with Cloudflare Email Routing
02/09/2024
If you’re using Cloudflare Email Routing and need a way to send emails, you’ll need to set up an SMTP server since Cloudflare doesn’t provide one. In this guide, I’ll walk you through how to use Gmail as your SMTP server.
Cloudflare Email Routing allows you to receive emails but doesn’t include an SMTP server for sending them. By using Gmail’s SMTP server, you can send emails from your custom domain, keeping your communications professional. While this guide focuses on Gmail, you can also use other SMTP servers like Outlook or Yahoo.
Step 1: Enable Two-Factor Authentication (2FA)
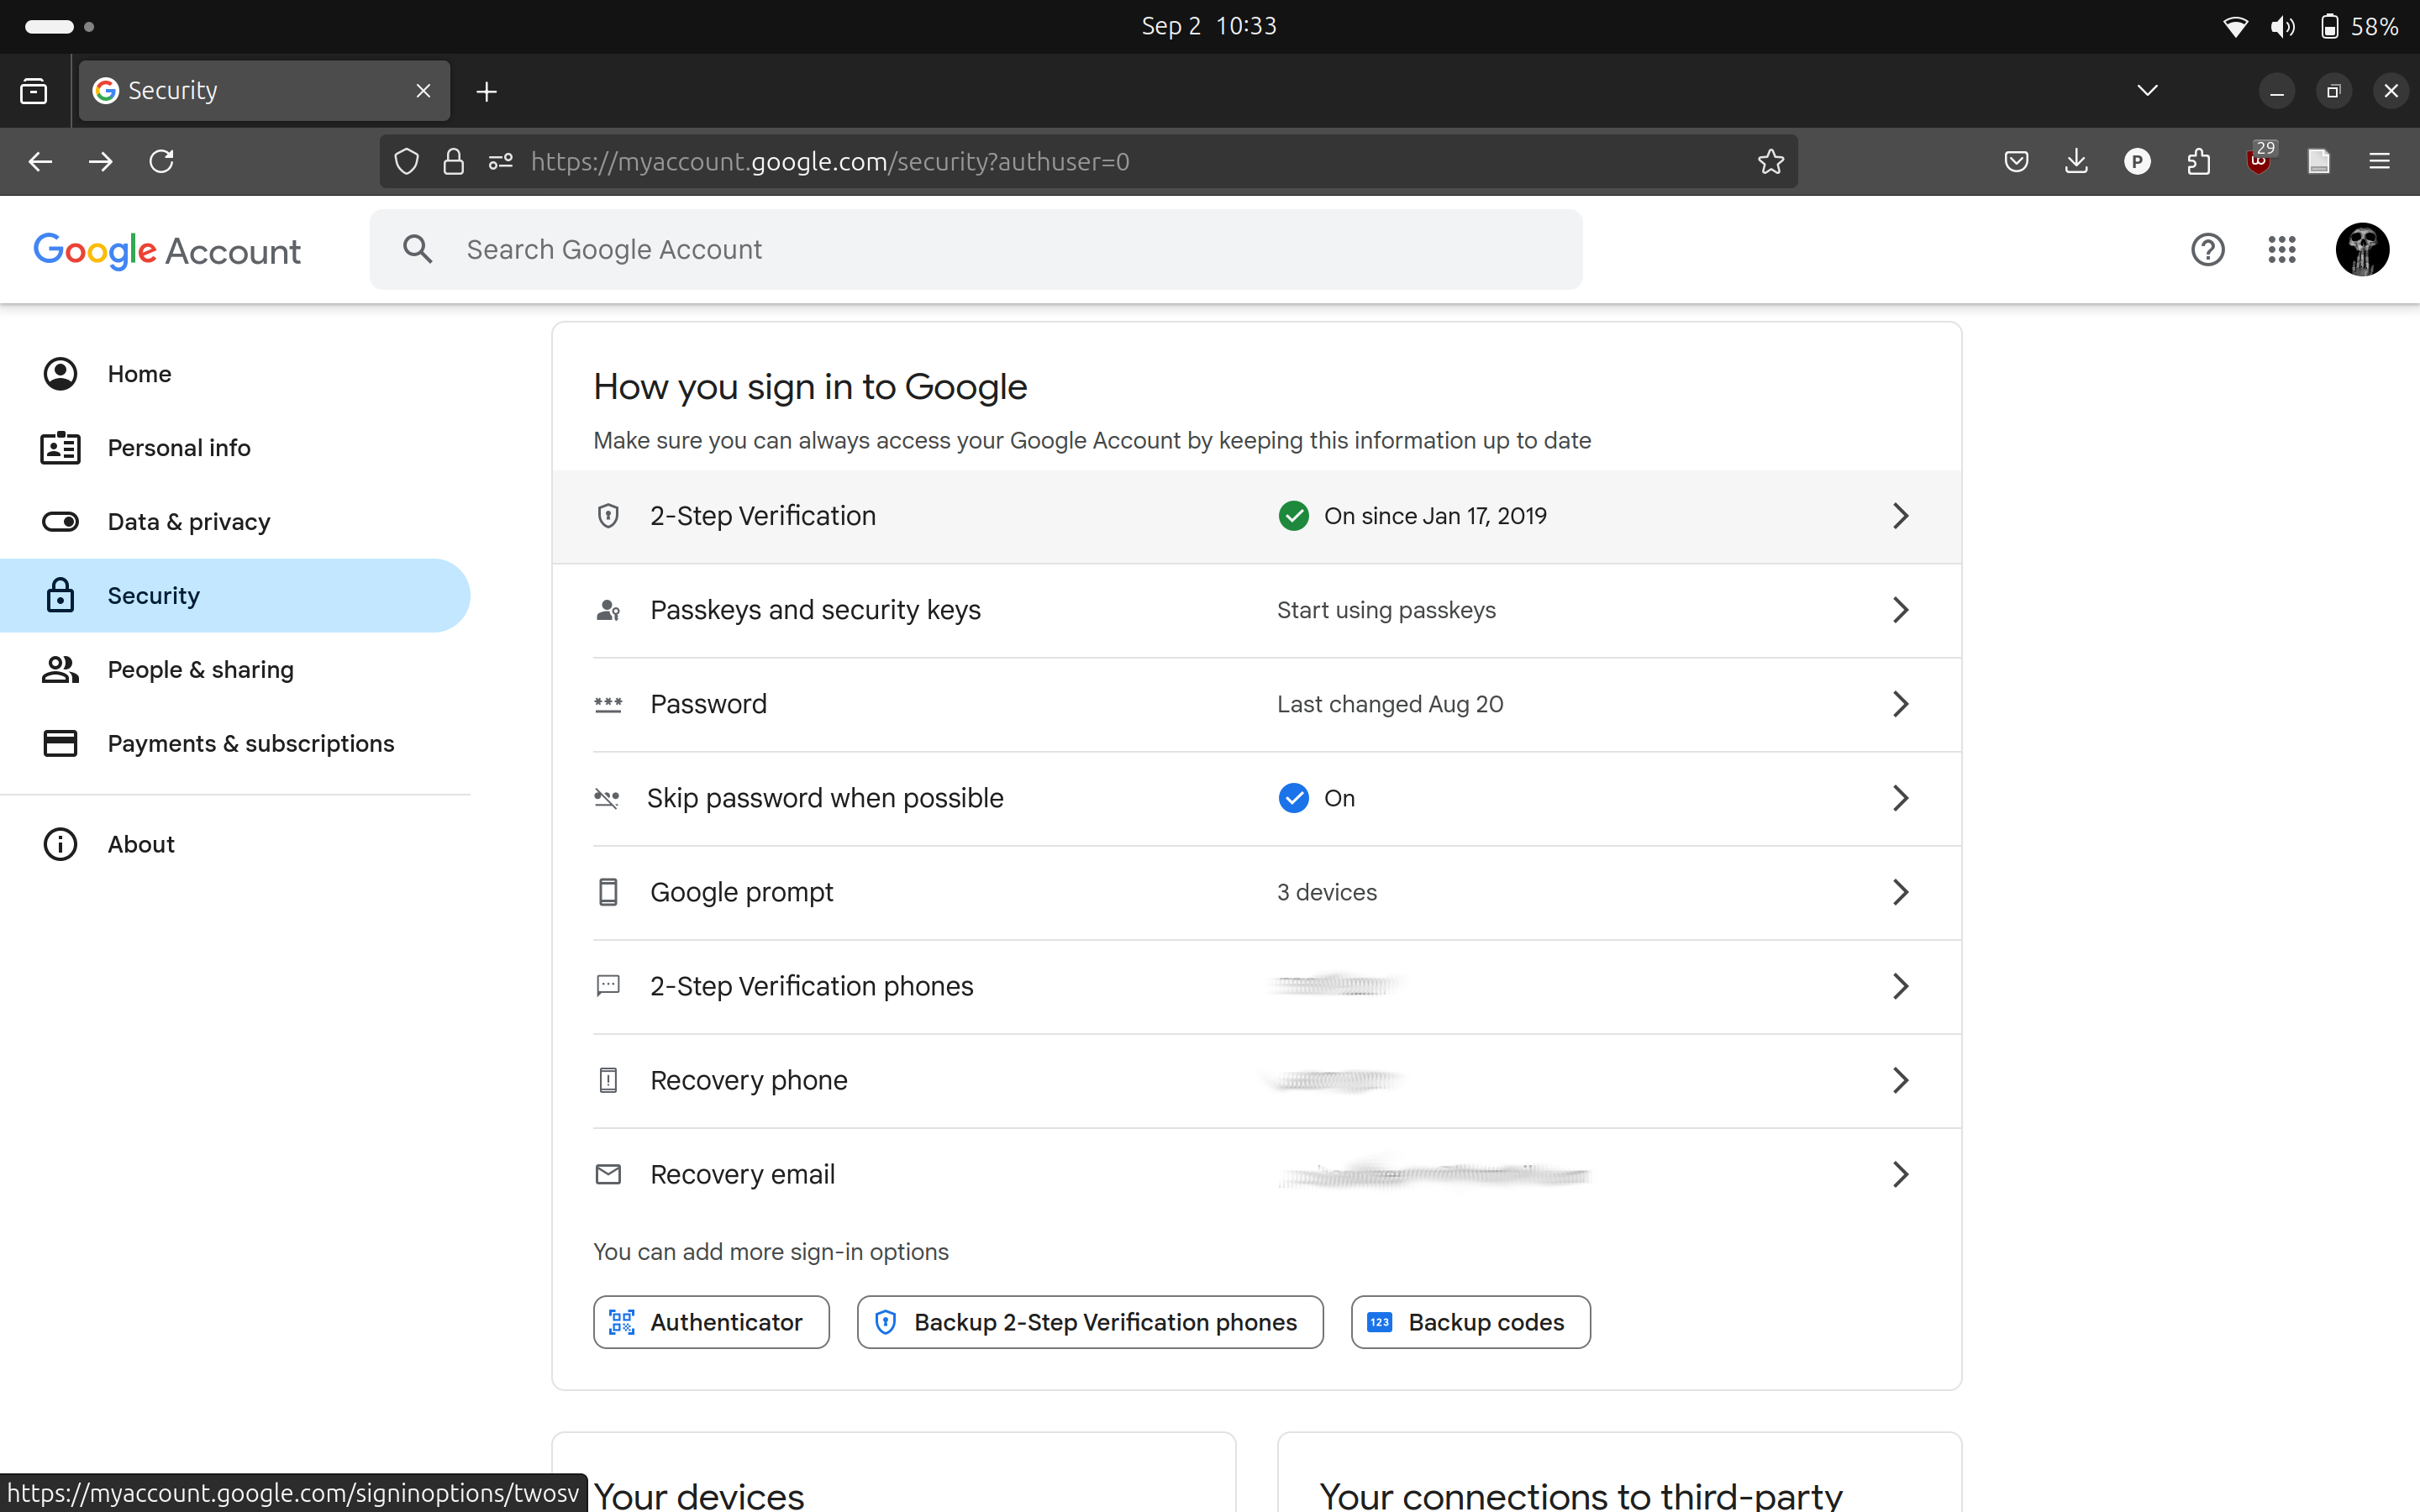
Before you can use Gmail’s SMTP server, you need to enable Two-Factor Authentication (2FA) on your Google account. This extra layer of security ensures that only you can access your account.
- Go to Google Account Security Settings.
- Enable 2FA by clicking on “2-Step Verification” and following the prompts.
Step 2: Create an App Password
Next, you’ll need to create an App Password specifically for this setup. This is a special password that allows Gmail to connect to your Cloudflare-routed email.
- Visit Google App Passwords.
- Set up your App Password For this example, I named it “Cyberstorm” for my group’s domain, but you can choose any name.
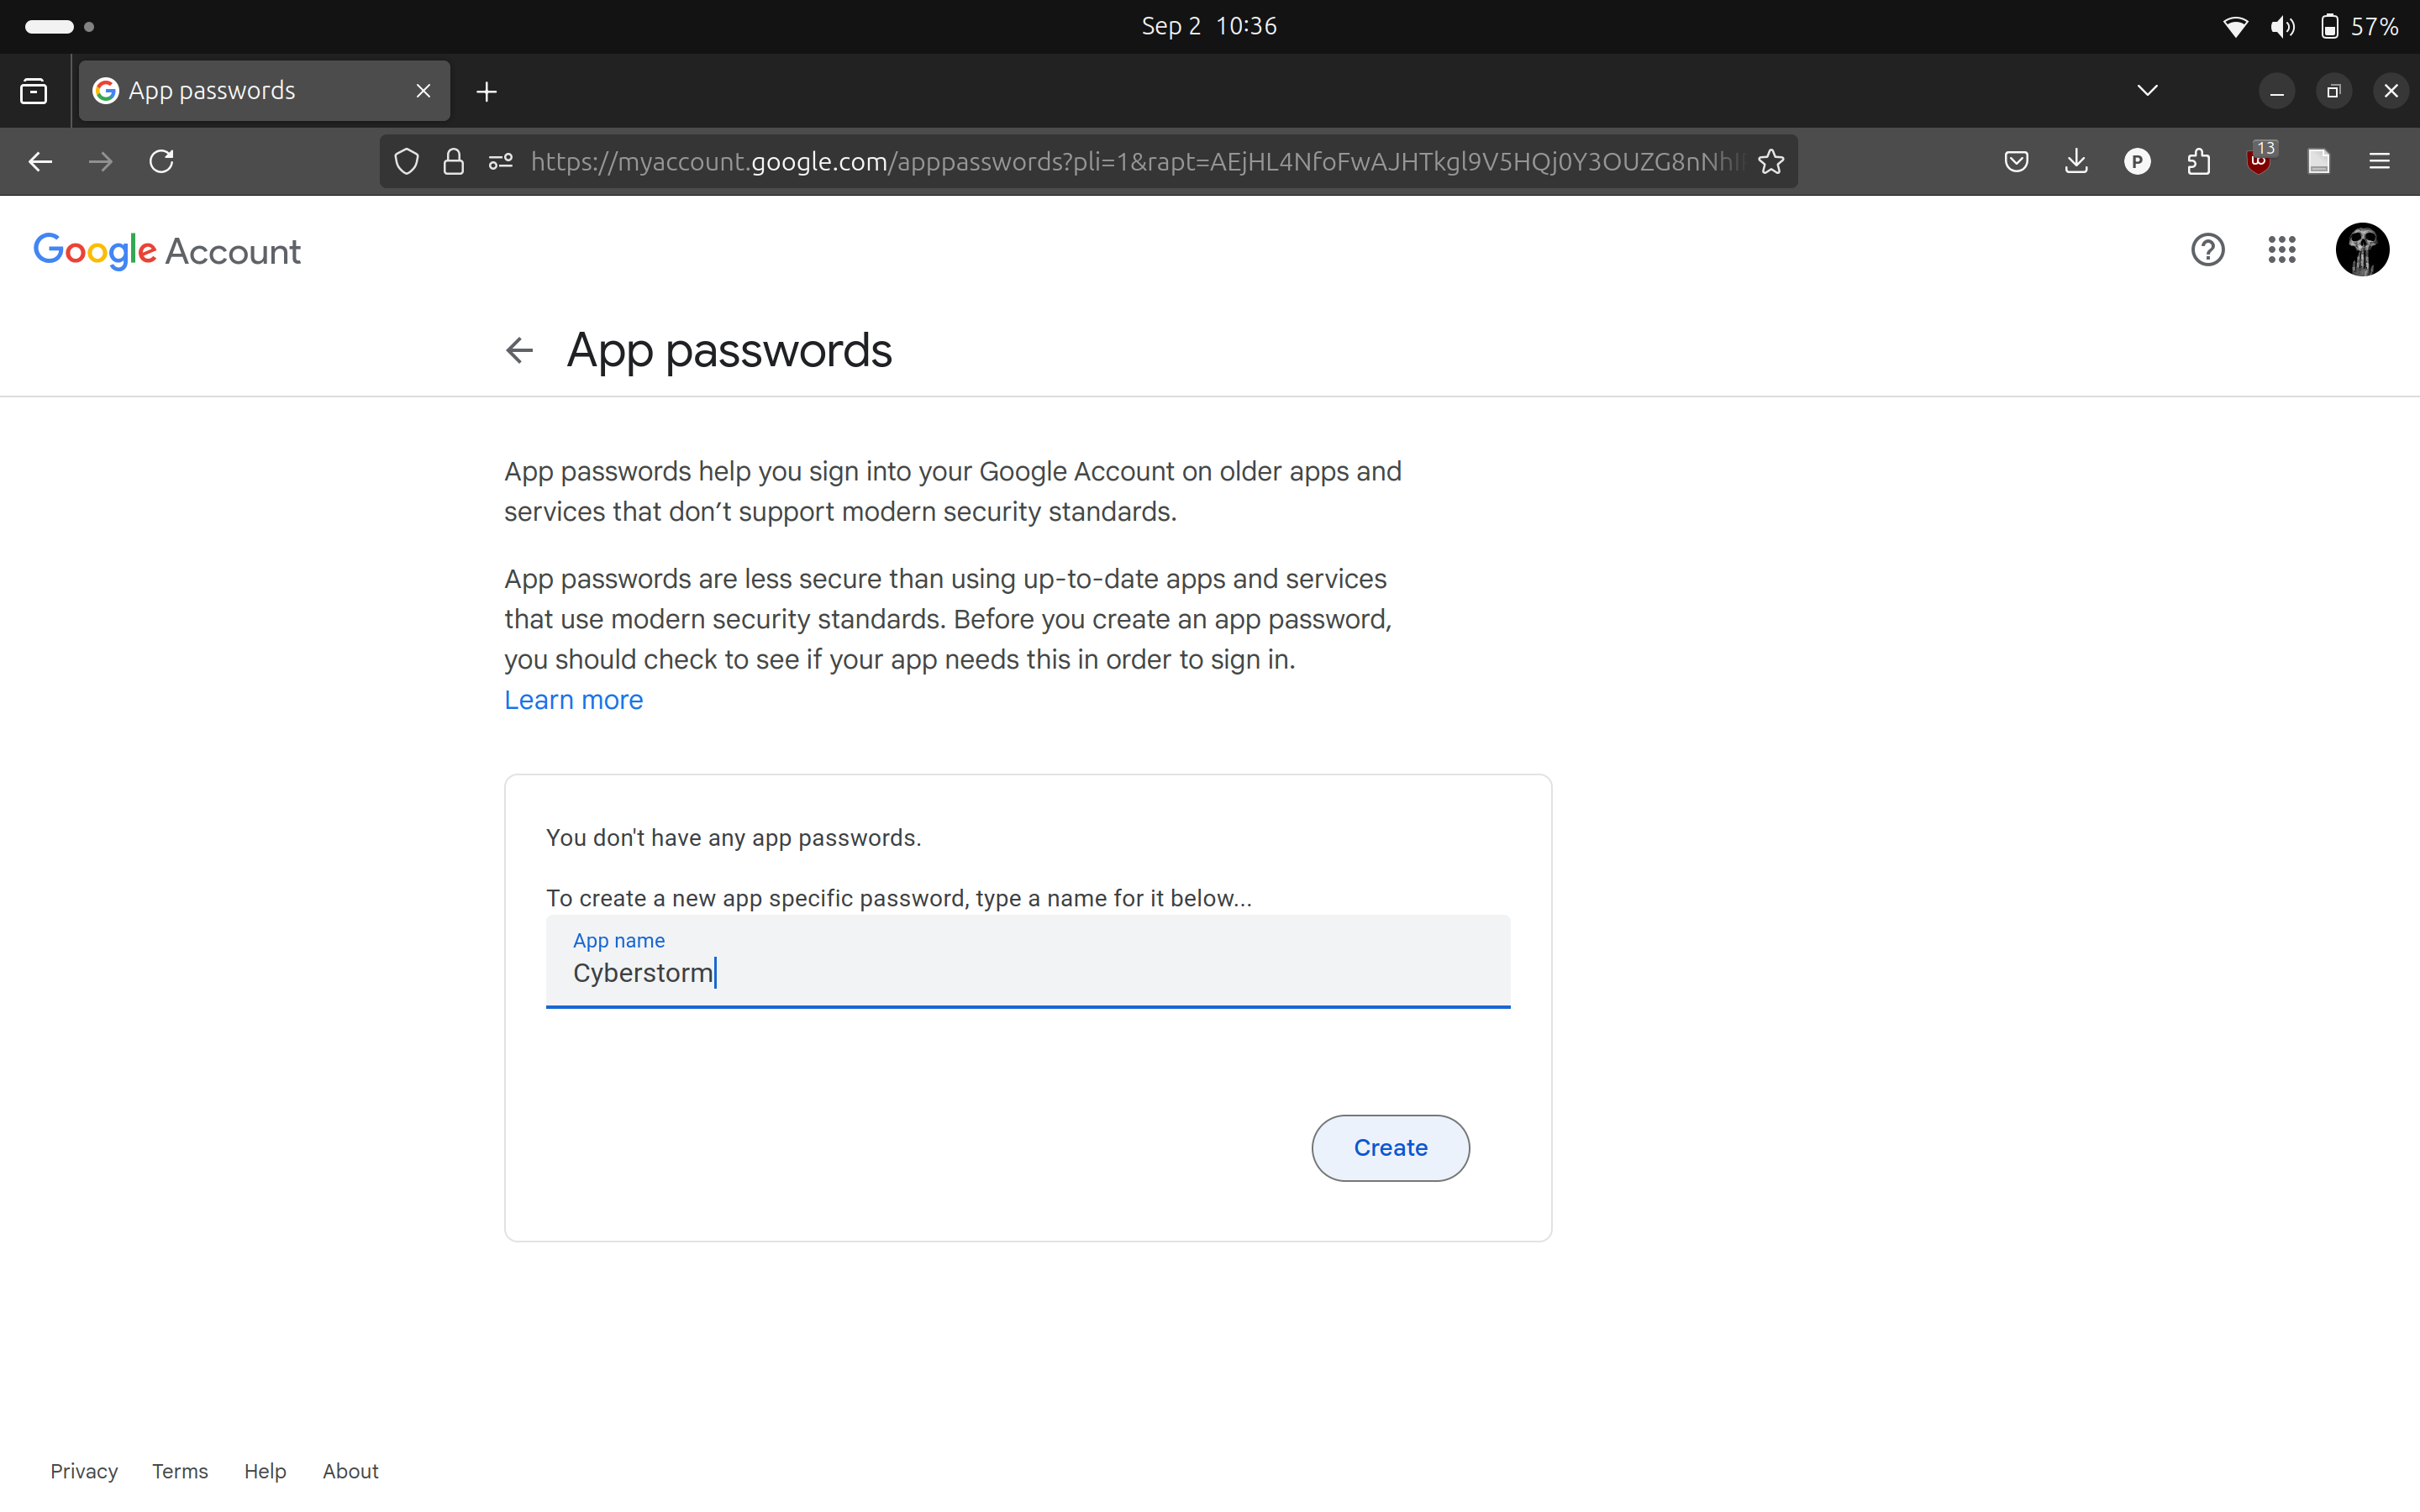
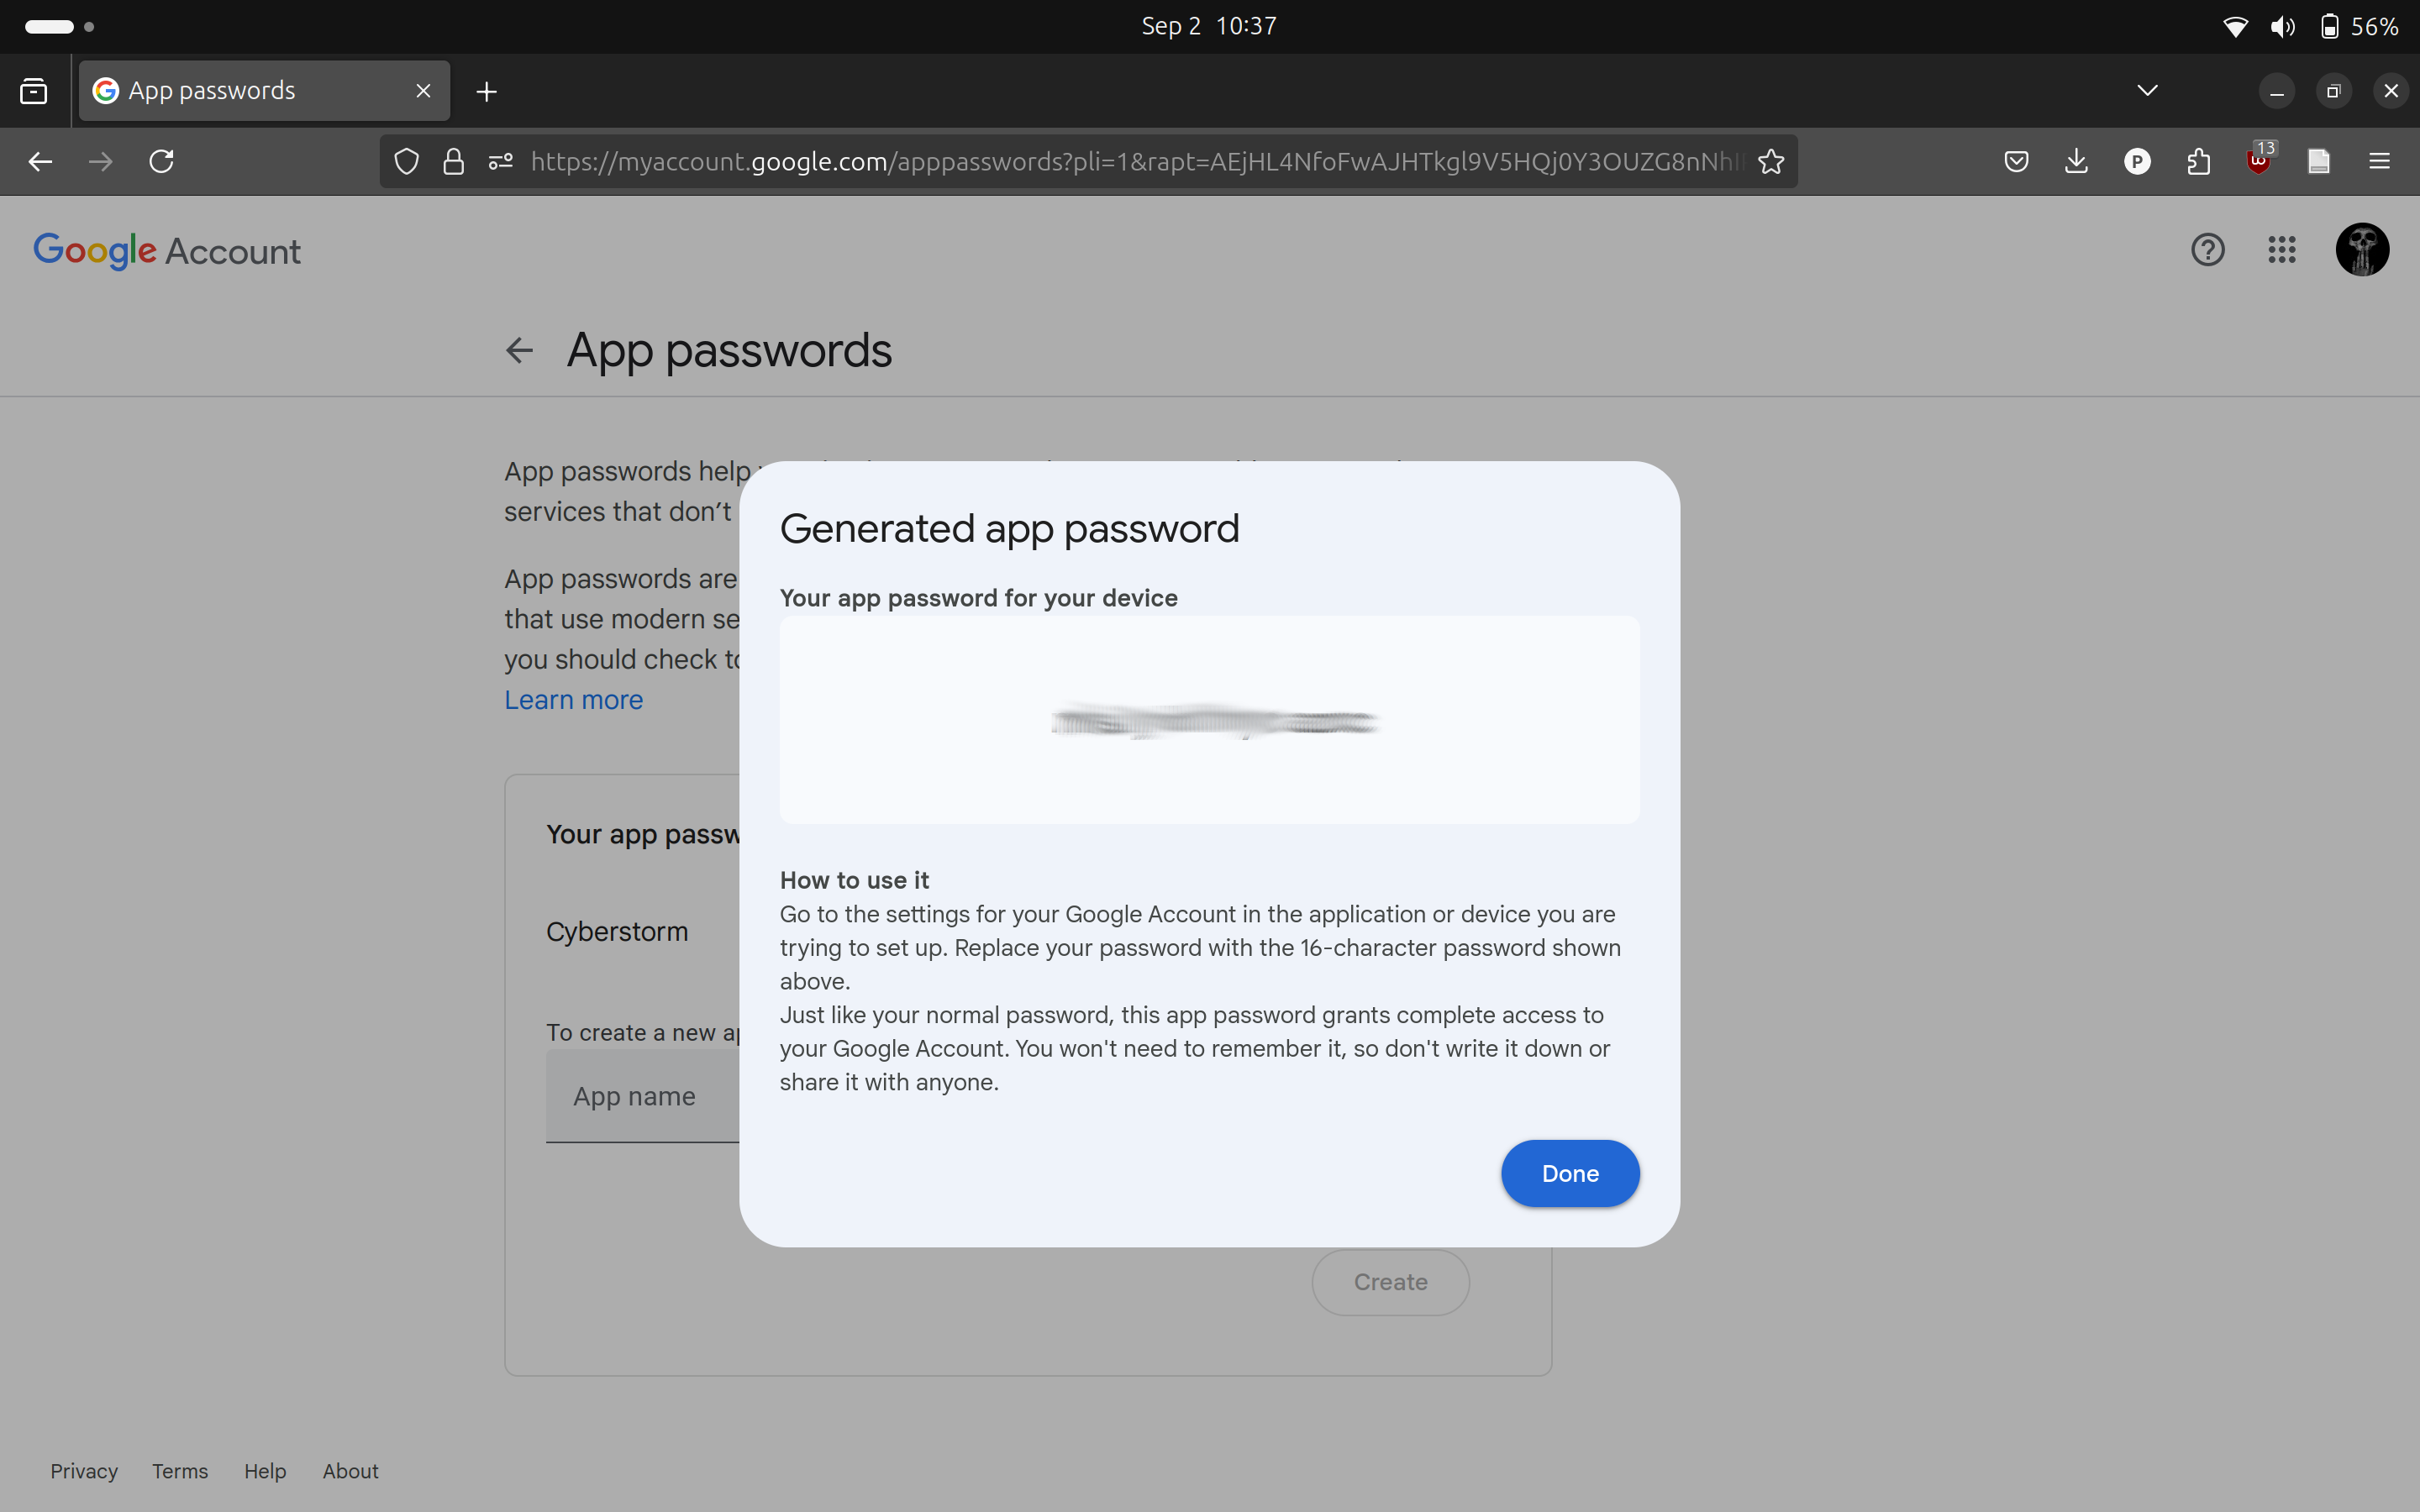
- Copy the generated password—you’ll need this later.
Step 3: Add Your Cloudflare Email to Gmail
Now, you’ll add your Cloudflare-routed email address to Gmail so you can send emails from it.
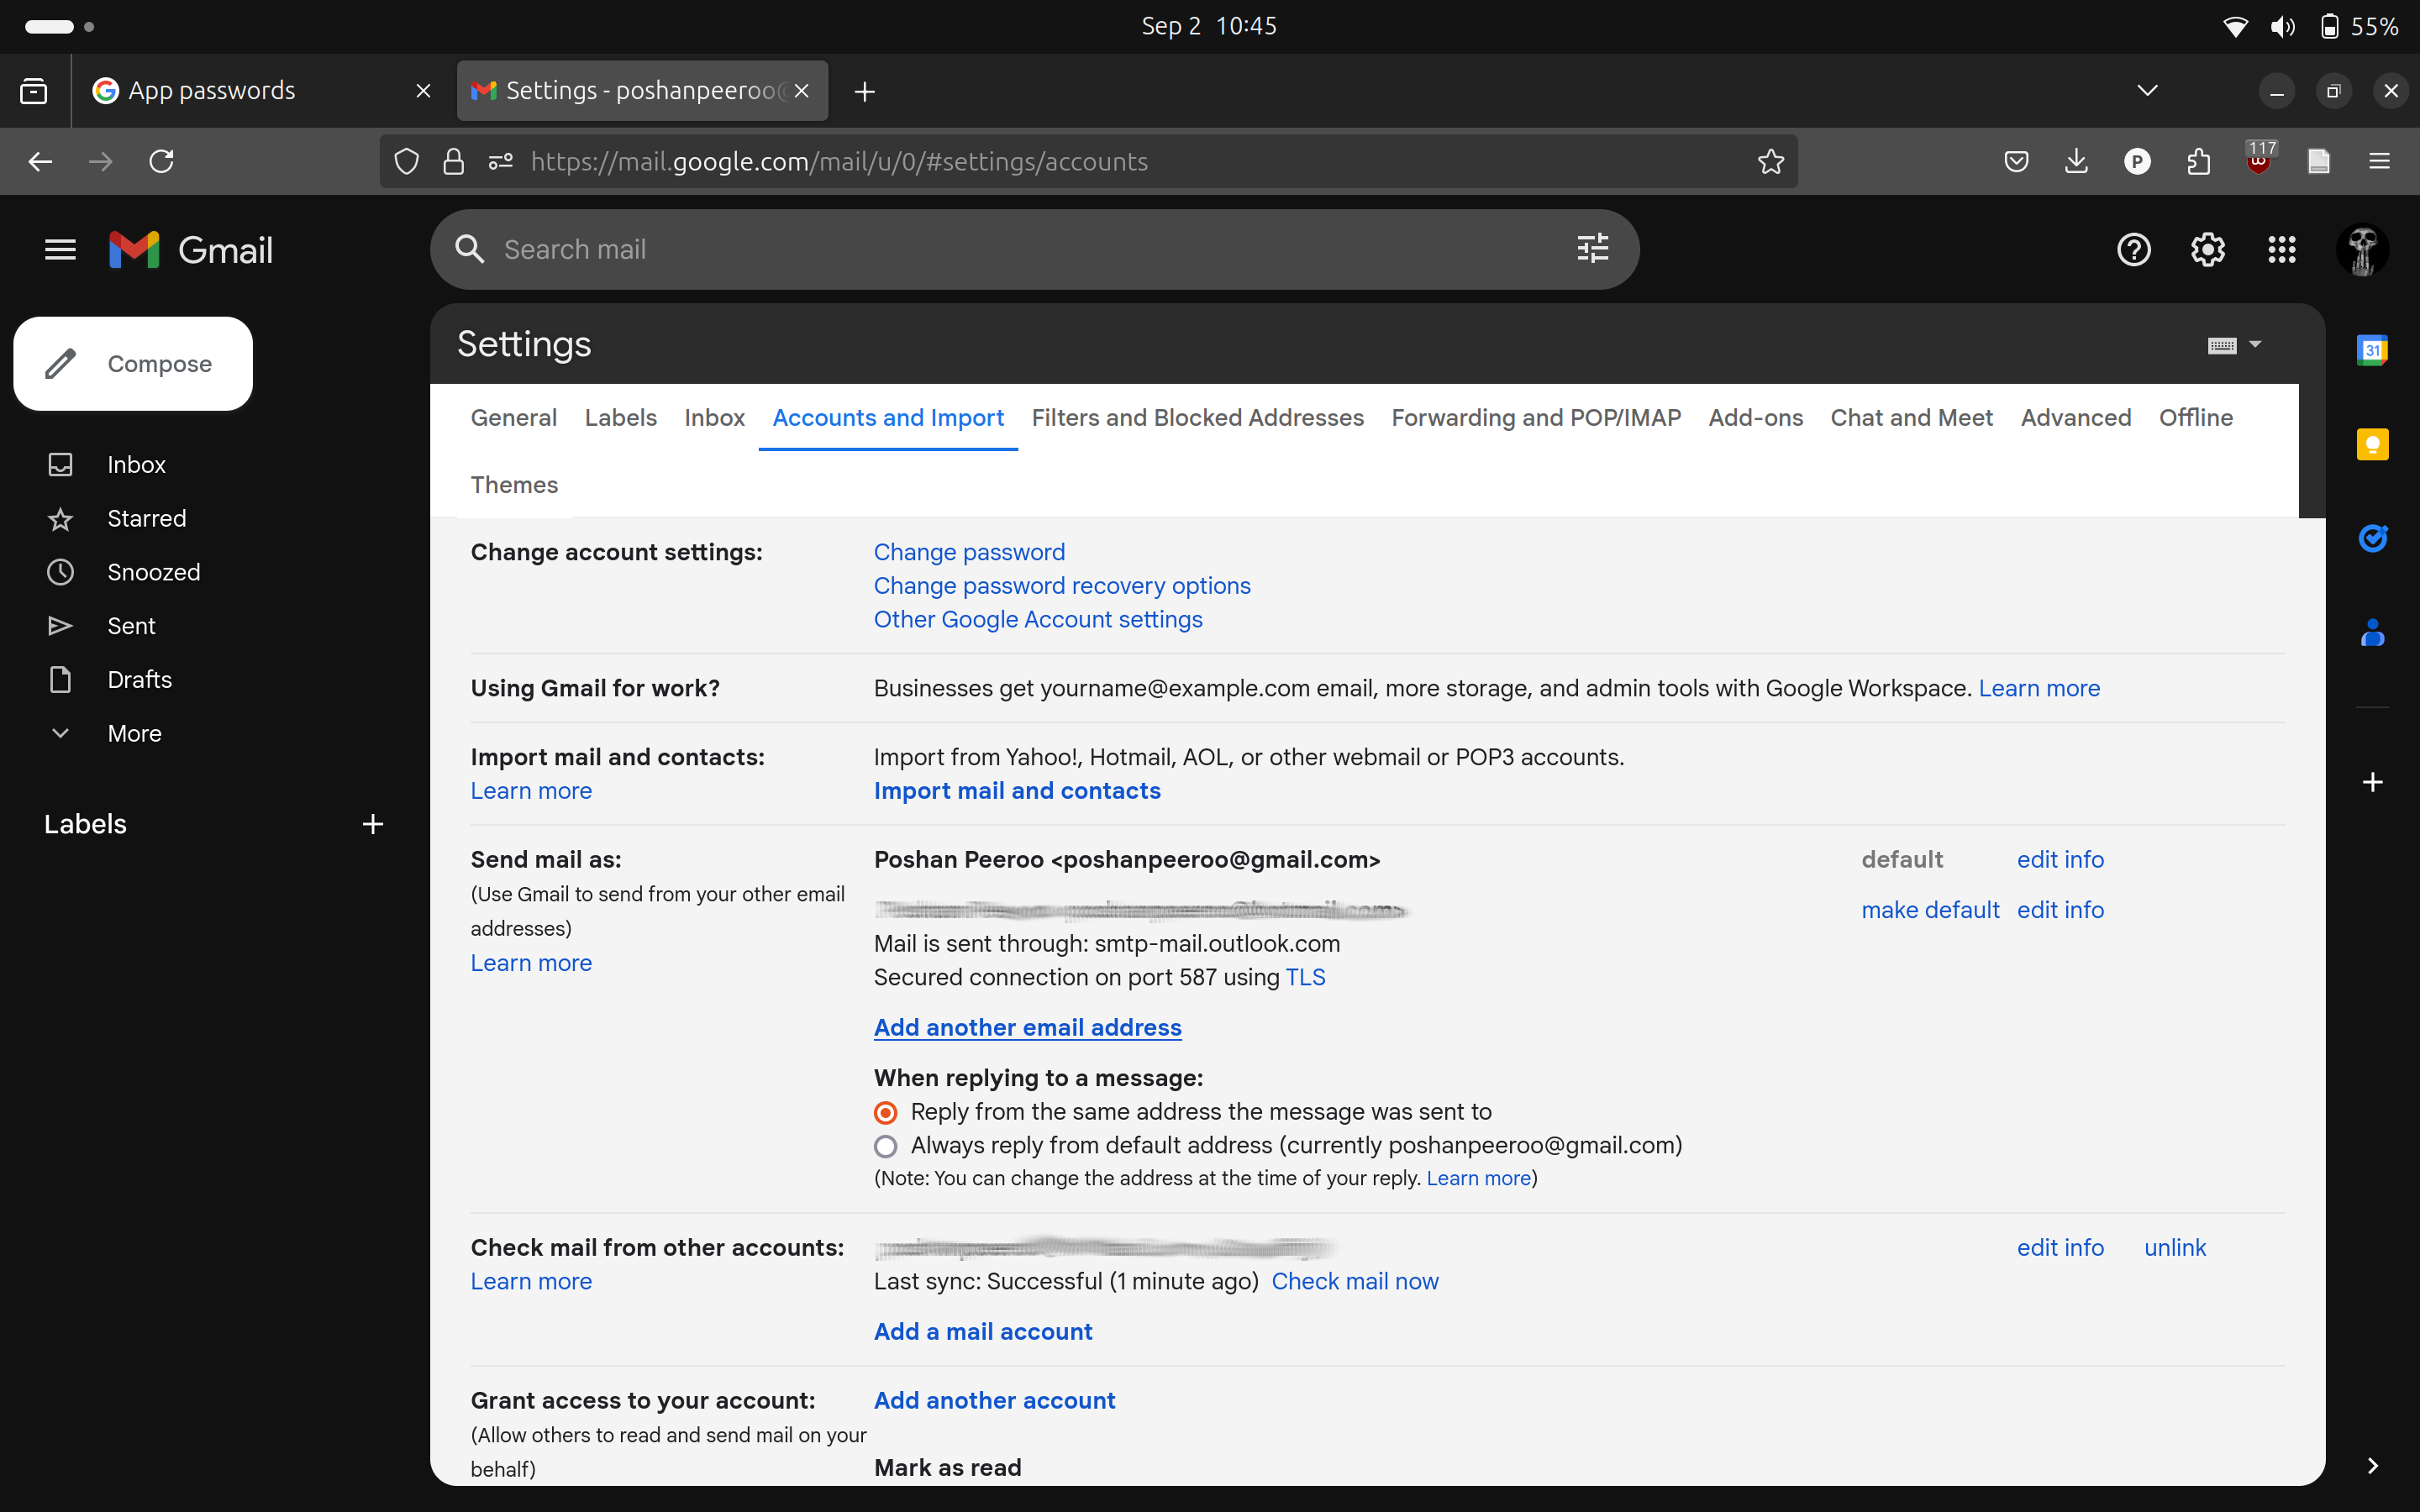
- Open Gmail and click on the settings icon, then select “See all settings.”
- Navigate to the “Accounts and Import” tab.
- Scroll down to the “Send mail as” section and click on “Add another email address.”
Step 4: Enter Your Name and Email Address
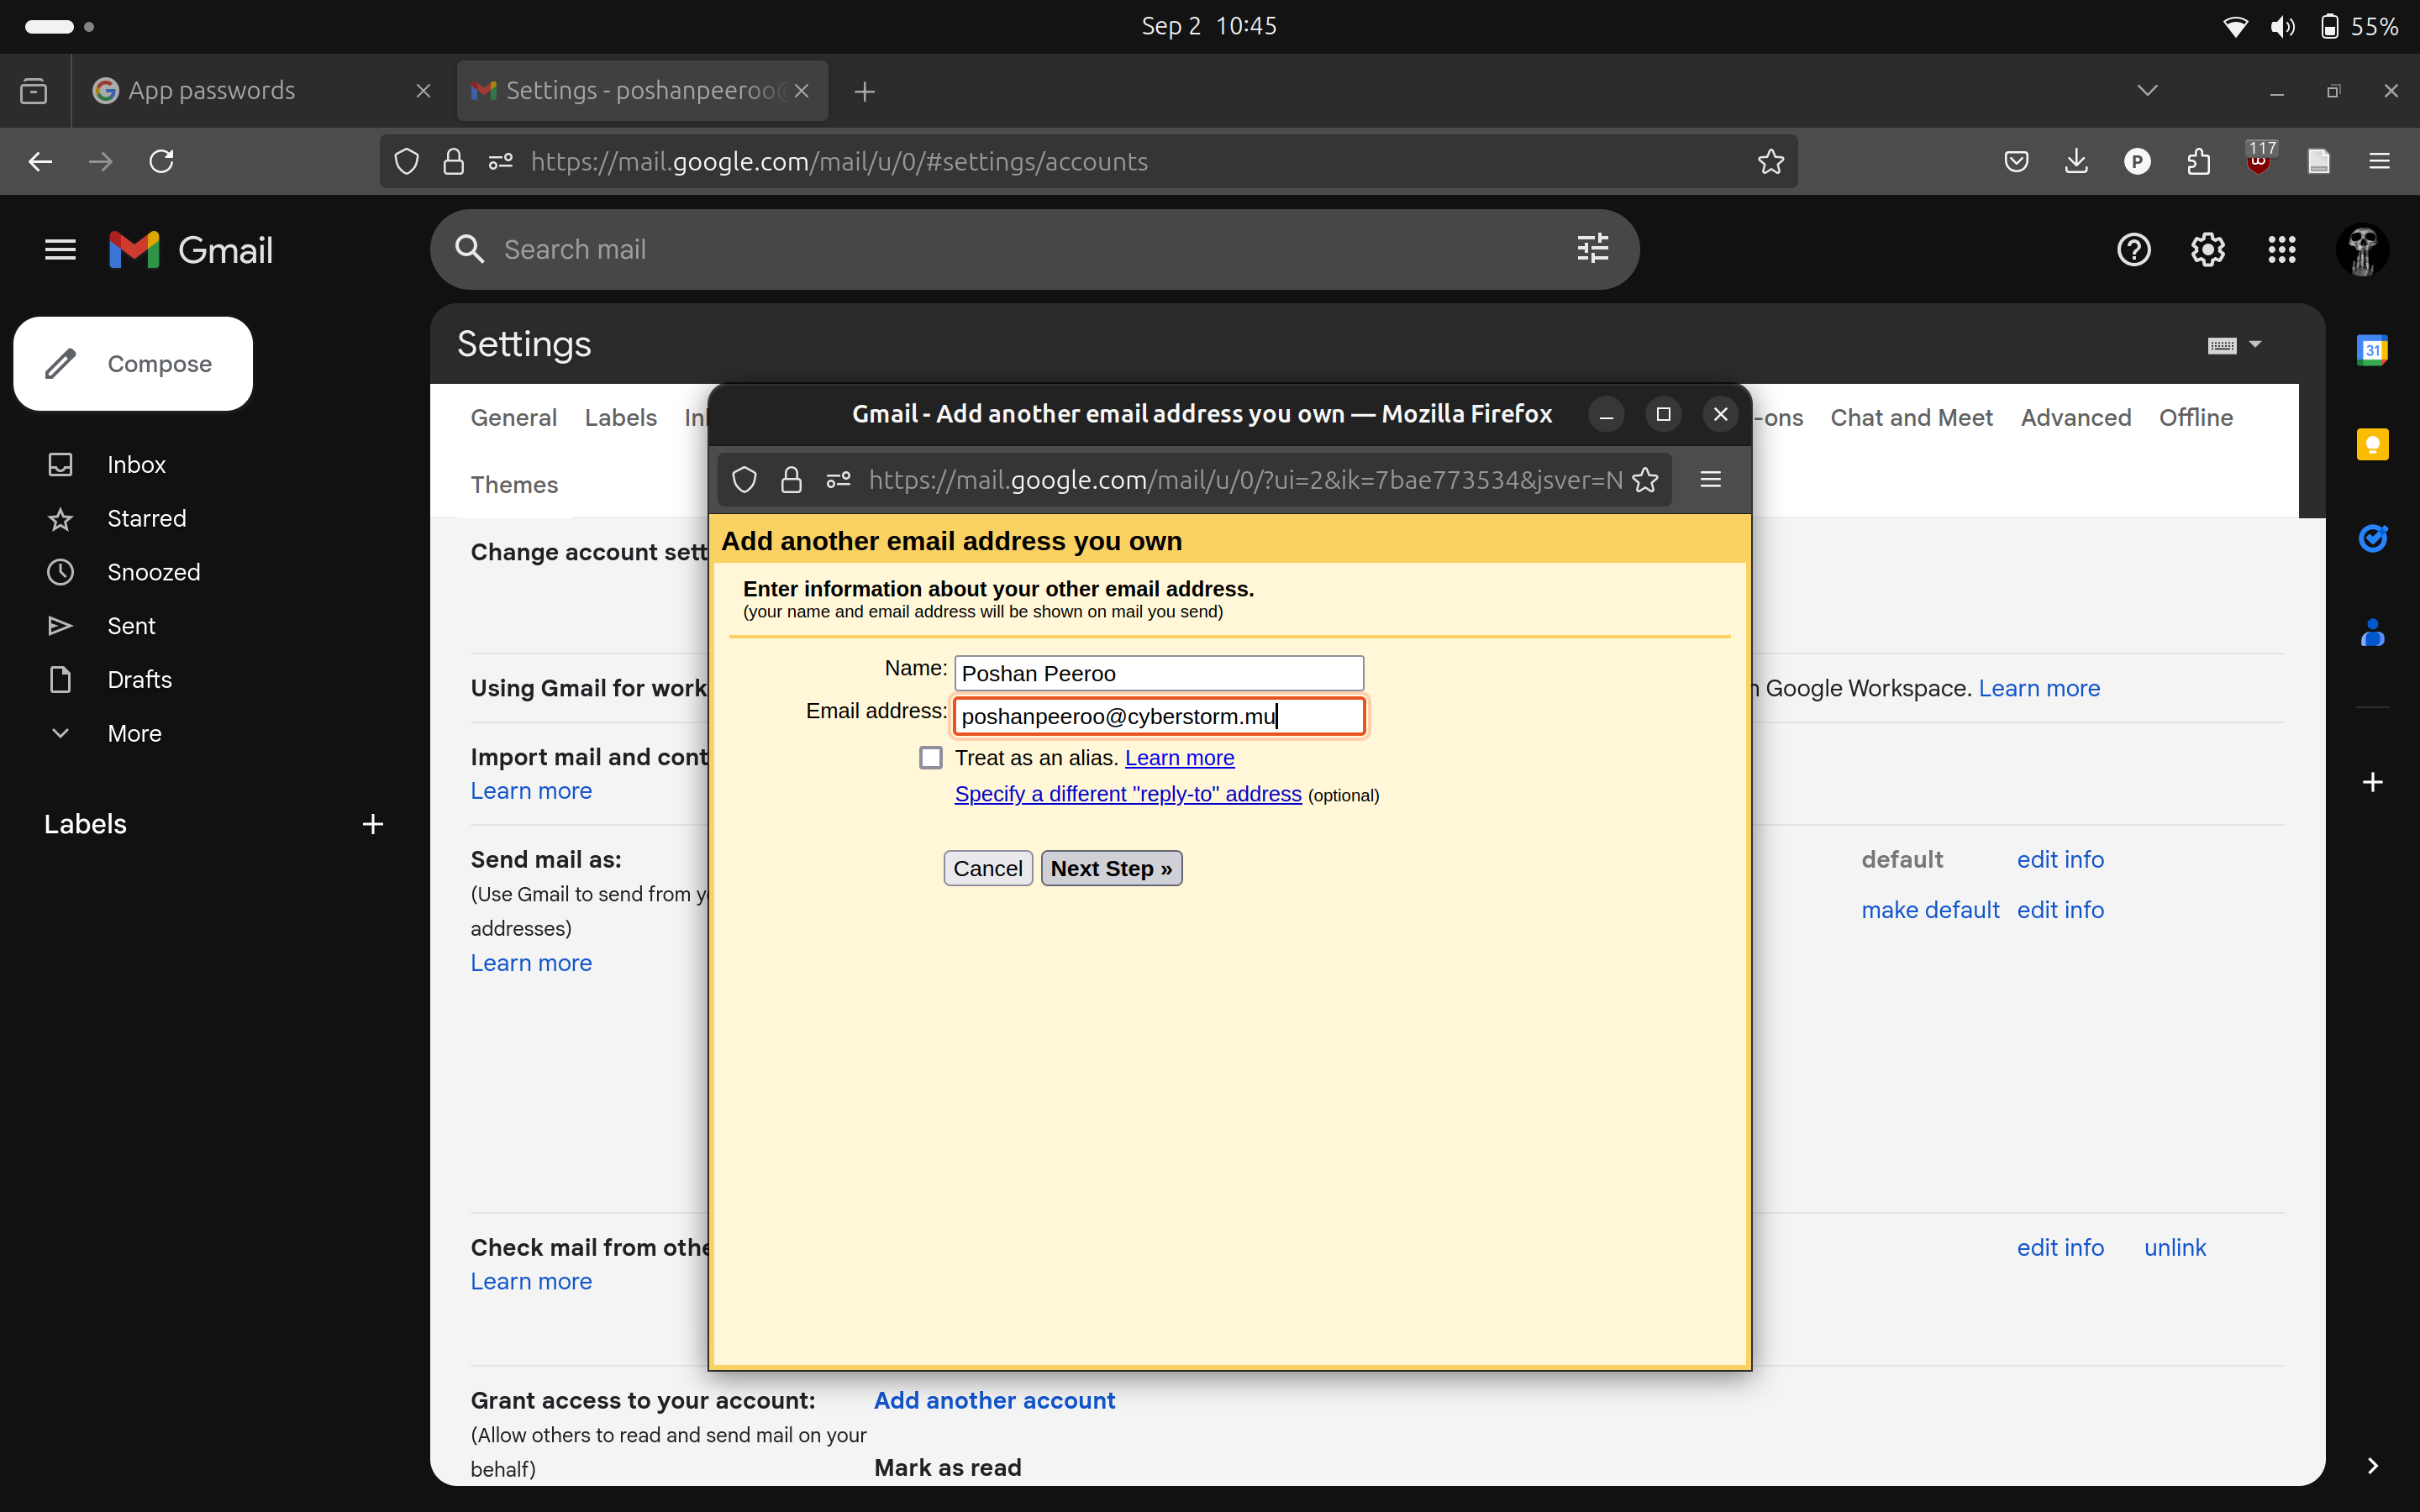
A pop-up window will appear where you can enter your name and custom domain email address.
- Enter your name and your Cloudflare-routed email address.
- Uncheck the “Treat as an alias” box.
- Click “Next Step.”
Step 5: Configure the SMTP Server Settings
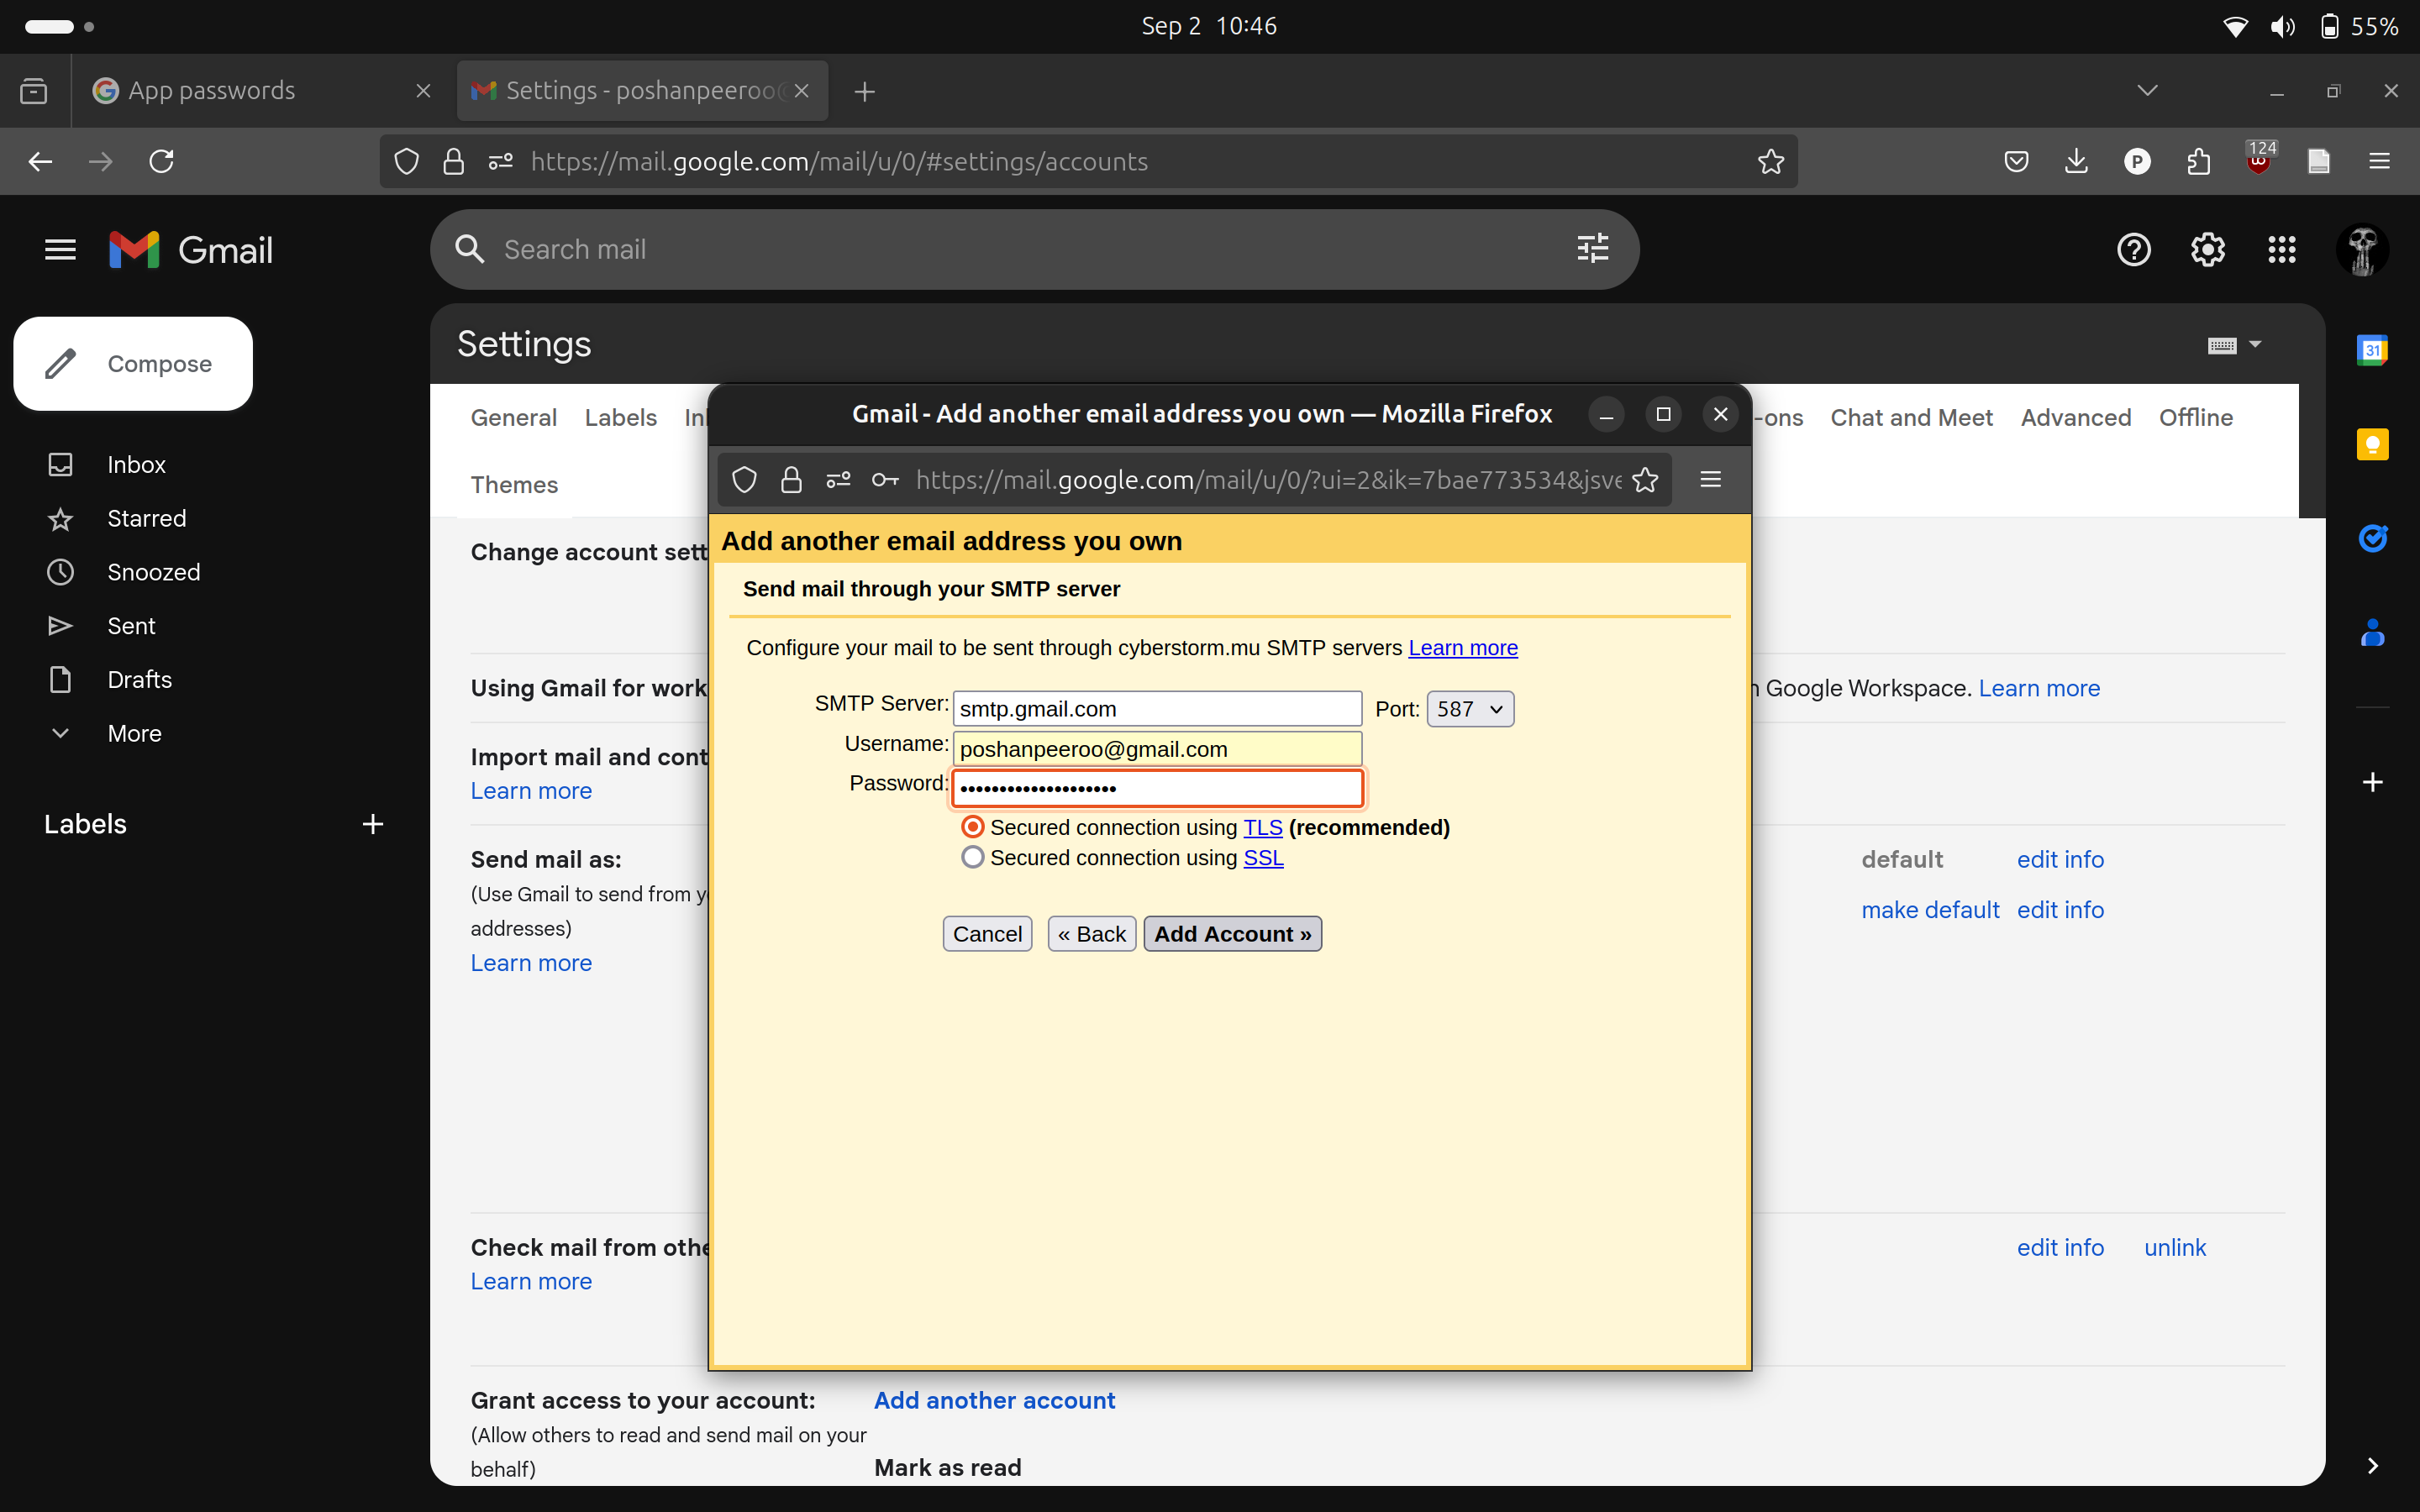
Now you’ll enter the SMTP server details to allow Gmail to send emails on behalf of your custom domain.
- SMTP Server: smtp.gmail.com
- Port: 587
- Username: Your Gmail address (e.g., [email protected])
- Password: The App Password you generated earlier
- TLS: Make sure it’s selected
Step 6: Verify Your Email Address
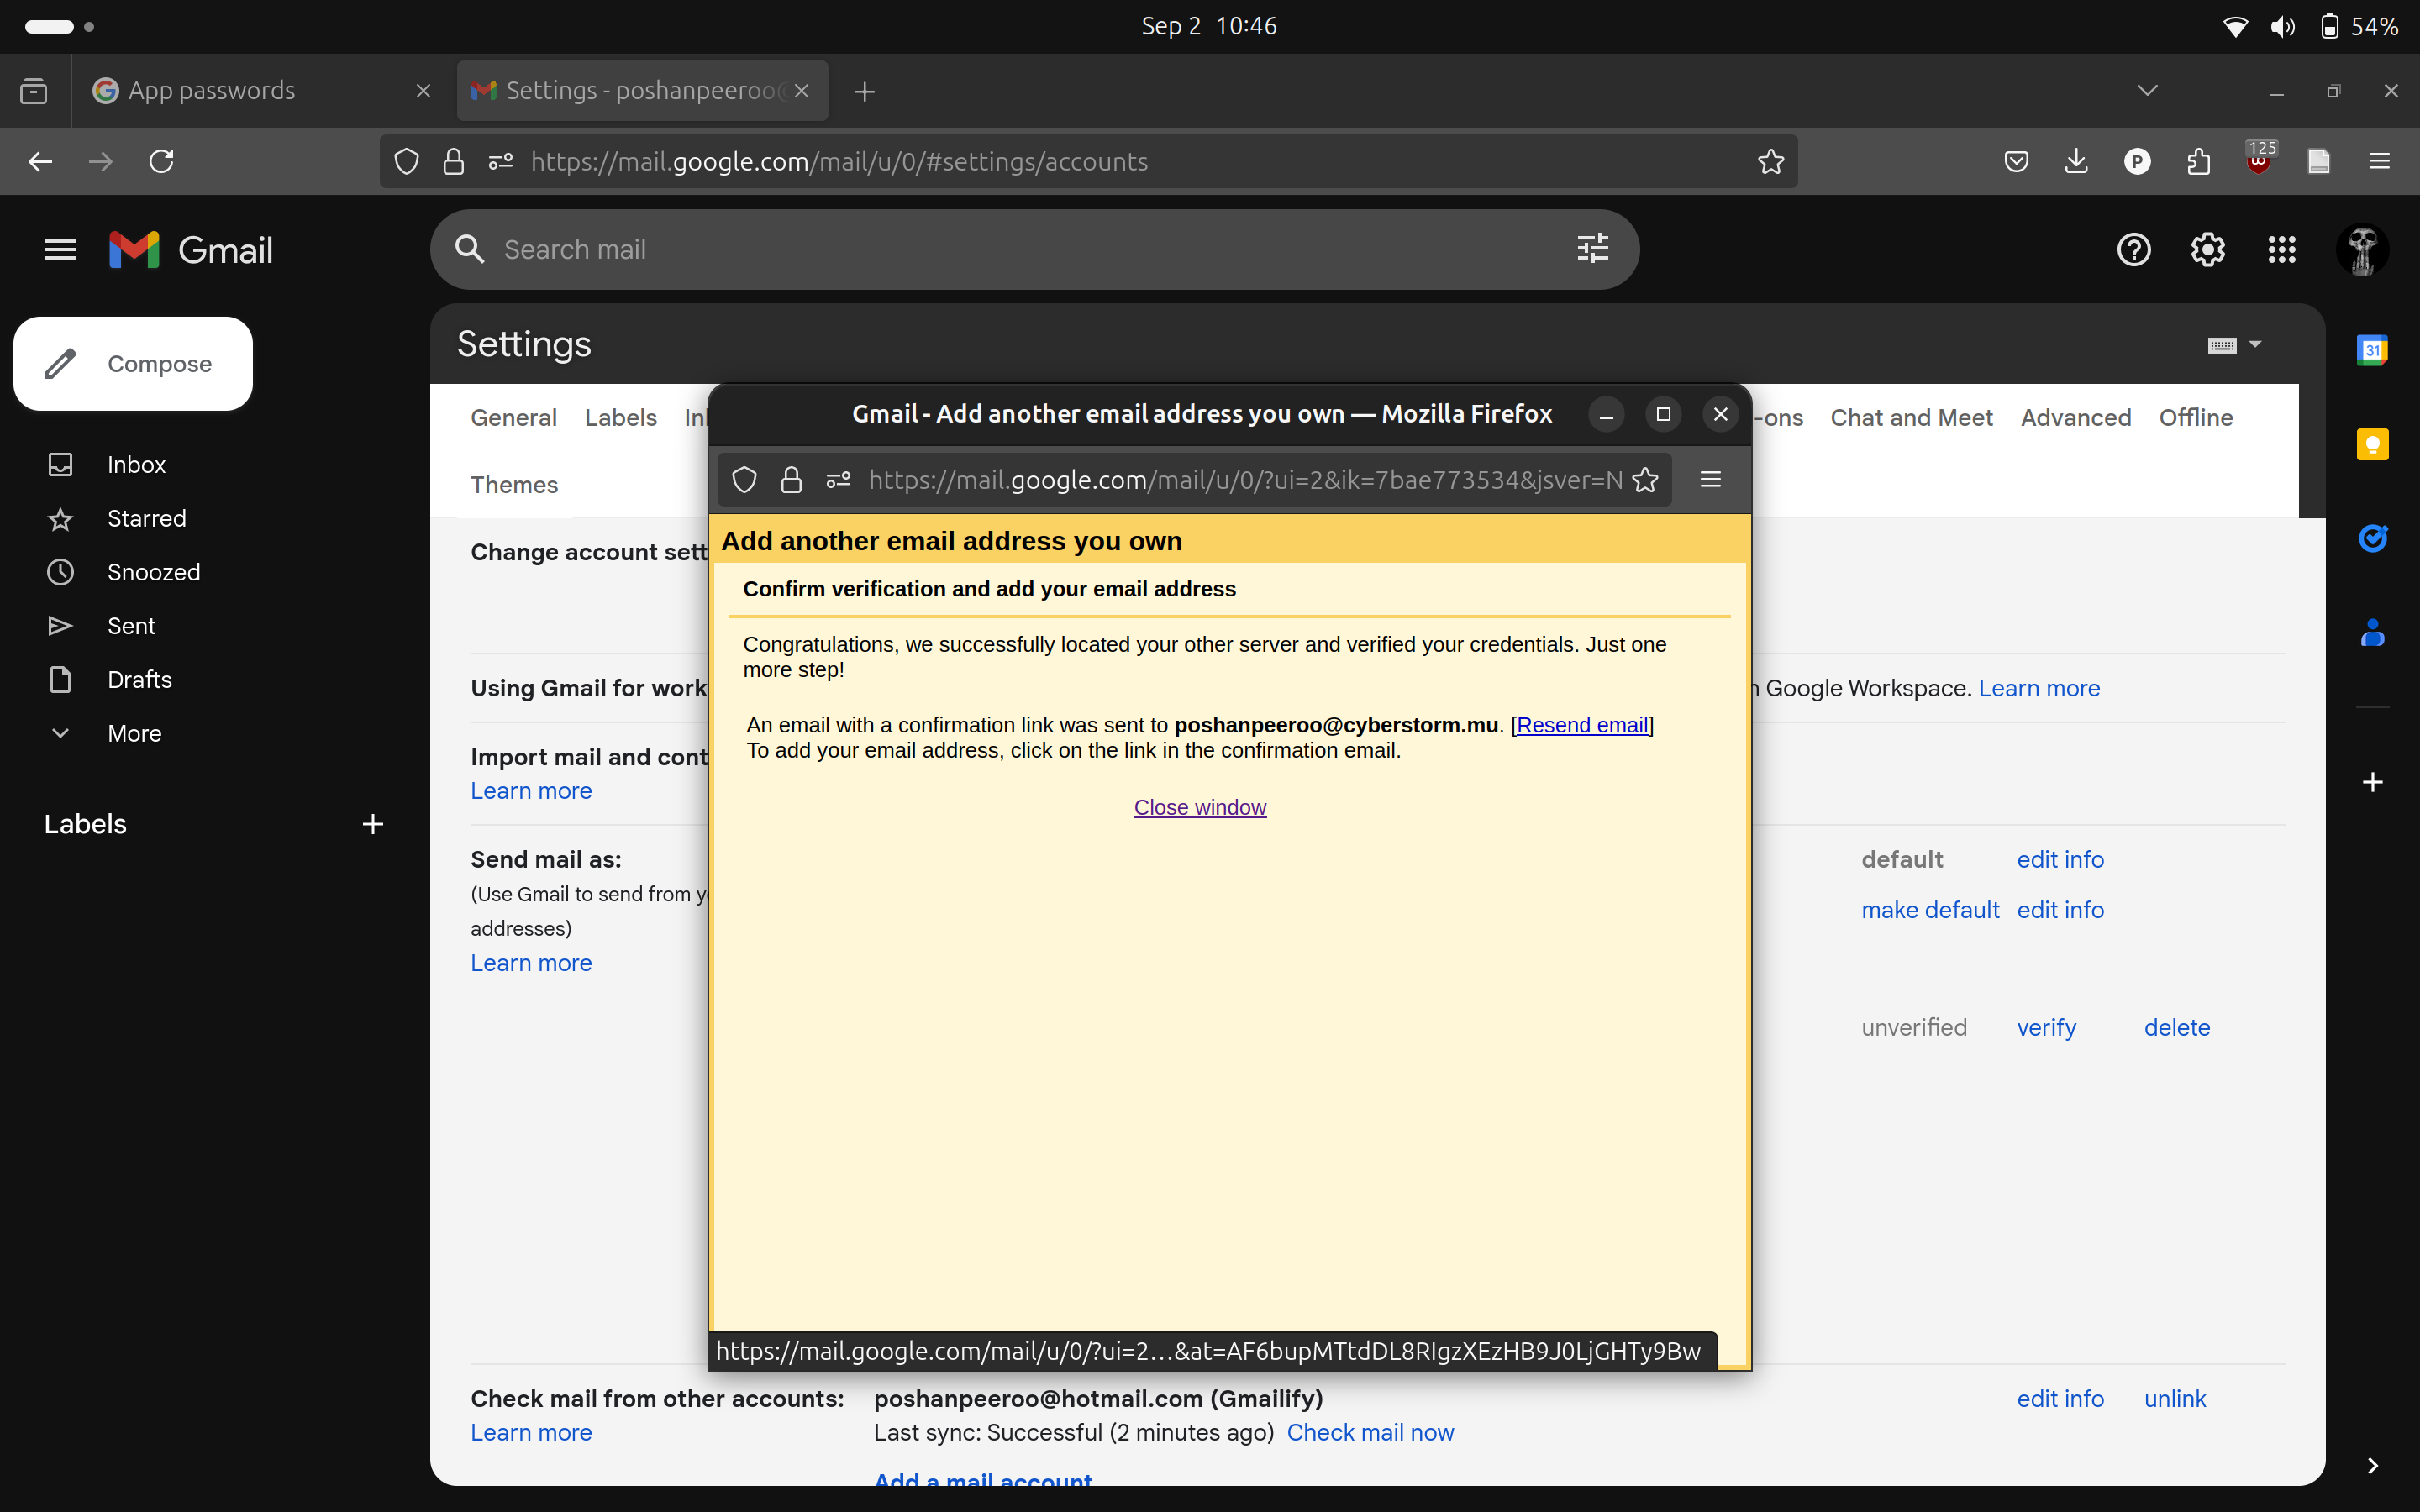
After entering the SMTP settings, Gmail will send a confirmation email to your Cloudflare-routed email address to verify that you own it.
- Check your email for a confirmation message from Gmail.
- Click the verification link in the email.
Step 7: Send Emails from Your Custom Domain
Once the verification is complete, you can start sending emails from your Cloudflare-routed email address directly from Gmail.
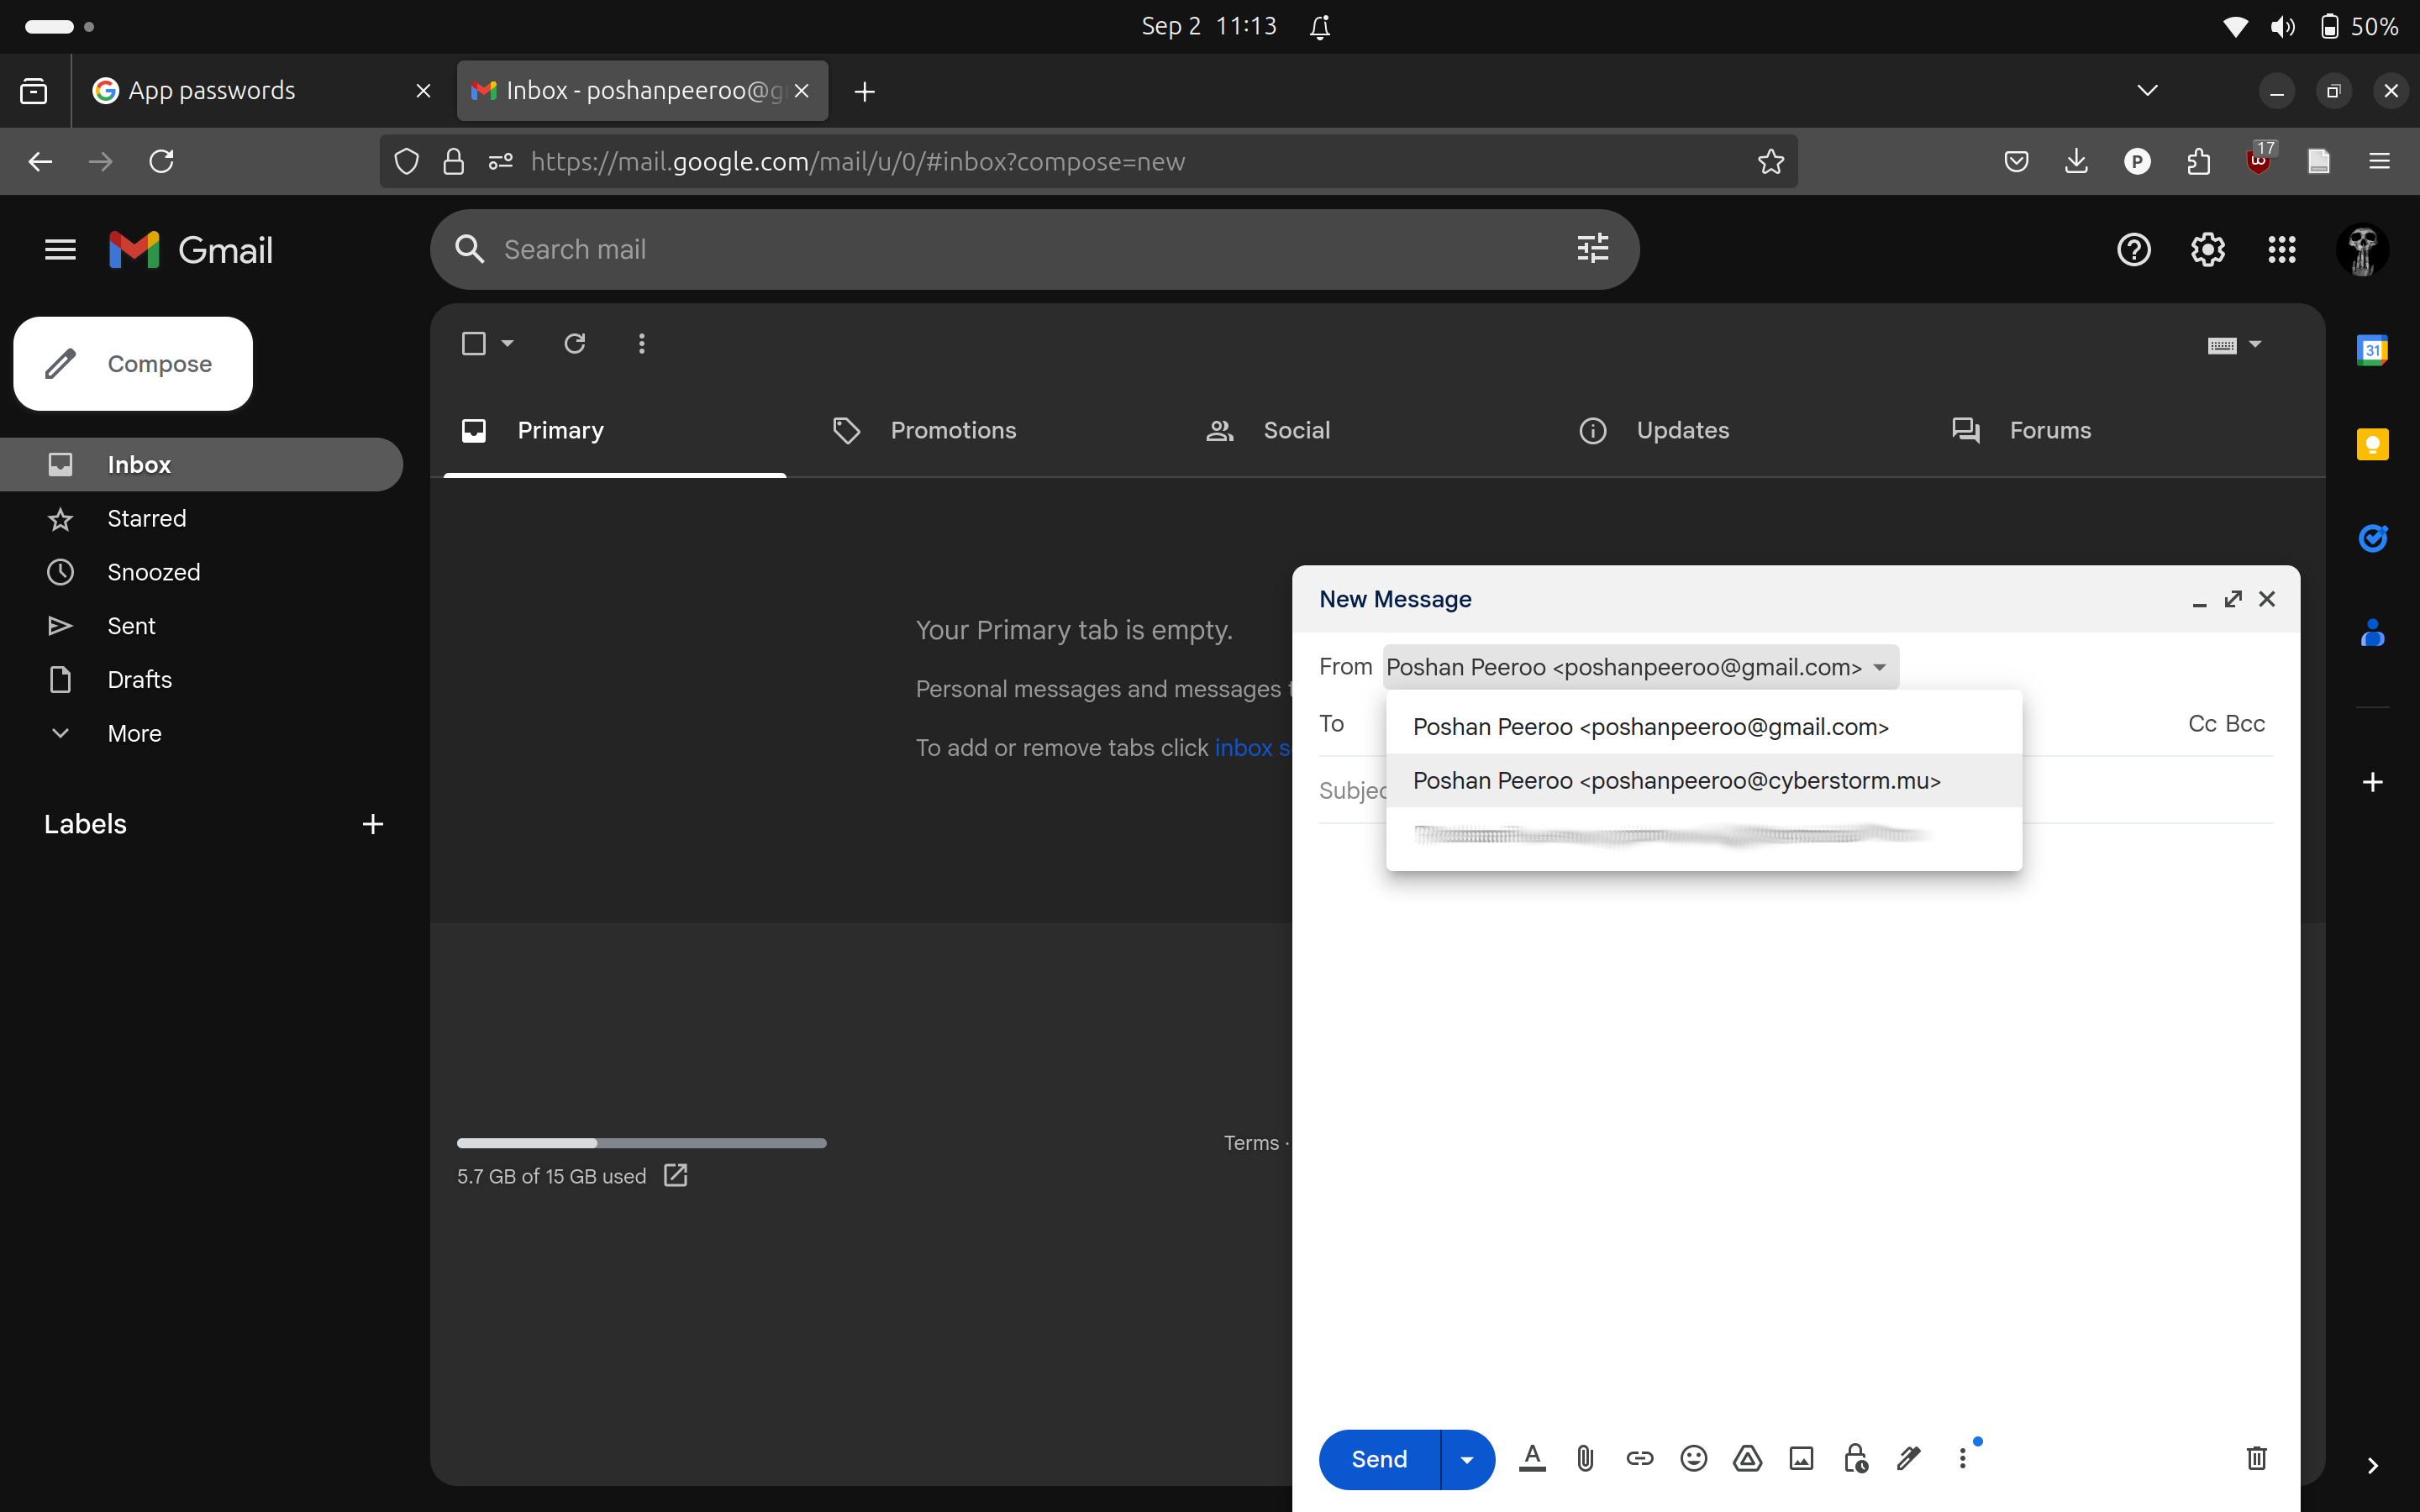
By following these steps, you’ve successfully set up Gmail’s SMTP server with Cloudflare Email Routing. This setup allows you to send emails using your custom domain. While Gmail is a reliable choice, remember that you can use other SMTP servers like Outlook if you prefer. Happy emailing!